Oracle Apps 12.1.1 installation on linux 6.3
In this article we are going to perform Oracle EBS R12.1.1 Installation in OEL 6.3
Linix installaton -
http://www.premieronlinetrainings.com/blog/oracle-dba/Linux-Installation-6.3/2/
Description:
Step by Step instructions to install Oracle Applications R12 on Oracle Enterprise Linux are
described in this article. This is a single node installation, meaning that the database, all product directories and
AD core directories, and all servers (concurrent processing, forms, and Web) are installed on a single node
under one common APPL_TOP
1) Perform operating system pre-requisites for R12.1.1
2) Files required to Install EBS R12.1.1
3) Creating Staging Area
4) Installation of EBS R12.1.1
Perform operating system pre-requisites for R12.1.1:
STEP 1:
Install the required RPM’s:
RPM for Oracle EBS can be installed using yum.
cd /etc/yum.repos.d
wget http://public-yum.oracle.com/public-yum-ol6.repo
Using a text editor or vi command in terminal, edit the following entries in the file /etc/yum.repos.d/public-yum-ol6.repo
cat public-yum-ol6.repo
[ol6_latest]
name=Oracle Linux $releasever Latest ($basearch)
baseurl=http://public-yum.oracle.com/repo/OracleLinux/OL6/latest/$basearch/
gpgkey=http://public-yum.oracle.com/RPM-GPG-KEY-oracle-ol6
gpgcheck=1
enabled=1
[ol6_addons]
name=Oracle Linux $releasever Add ons ($basearch)
baseurl=http://public-yum.oracle.com/repo/OracleLinux/OL6/addons/$basearch/
gpgkey=http://public-yum.oracle.com/RPM-GPG-KEY-oracle-ol6
gpgcheck=1
enabled=1
[ol6_UEK_latest]
name=Latest Unbreakable Enterprise Kernel for Oracle Linux $releasever ($basearch)
baseurl=http://public-yum.oracle.com/repo/OracleLinux/OL6/UEK/latest/$basearch/
gpgkey=http://public-yum.oracle.com/RPM-GPG-KEY-oracle-ol6
gpgcheck=1
enabled=1
Update all packages and then install the pre-install rpm by running the following yum commands:
yum clean all
yum update
yum install oracle-ebs-server-R12-preinstall
Note: Install the following RPM’s with minimum version of 2.17 or higher version, otherwise you will receive Error at Post validation installation. We can get the below RPM’s here.
glibc-devel-2.17-55.el6.i686
Note :
1: The openmotif package version must be 2.1.30 (for example, openmotif-2.2.3-10.RHEL4.5 is not supported).
2: This unzip package (available from EL 6 distribution) is only required for purposes of running Rapid Install to unzip the required EBS files as part of the installation and should be reverted after the install of EBS. Alternatively, users can backup the existing unzip 6.0 in /usr/bin, copy the unzip 5.5 from the EBS staging directory to /usr/bin for purposes of installing EBS, and then restore the unzip 6.0 when done.
mv /usr/bin/unzip /usr/bin/unzip-ver6
After installing the RPM’s, restart machine then run following command to link all libraries “ldconfig -v” to create necessary links and cache to the most recent shared libraries
ldconfig -v
STEP 2:
Change SELINUX as follows and Restart Machine to take changes to effect:
cat /etc/selinux/config
SELINUX=permissive
STEP 3:
Stop the iptables service:
service iptables stop
Stop the iptables service from starting when you restart the server:
chkconfig iptables off
STEP 4:
Configure Kernel parameters:
cat /etc/sysctl.conf
net.ipv4.ip_forward = 0
net.ipv4.conf.default.rp_filter = 1
net.ipv4.conf.default.accept_source_route = 0
kernel.sysrq = 0
kernel.core_uses_pid = 1
net.ipv4.tcp_syncookies = 1
fs.aio-max-nr = 1048576
net.ipv4.tcp_tw_recycle = 0
kernel.shmall = 2097152
kernel.shmmax = 4294967295
kernel.shmmni = 4096
kernel.sem = 256 32000 100 142
fs.file-max = 131072
net.ipv4.ip_local_port_range = 10000 65000
kernel.msgmni = 2878
kernel.msgmax = 8192
kernel.msgmnb = 65535
net.core.rmem_default = 262144
net.core.wmem_default = 262144
net.core.rmem_max = 4194304
net.core.wmem_max = 262144
Run the following command to change the current kernel parameters:
sysctl -p
STEP 5:
Verify /etc/sysconfig/network file is formatted as follows:
cat /etc/sysconfig/network
HOSTNAME=ebs1213.premier.com
Add IP Address and hostname of the server in the /etc/hosts file as below:
cat /etc/hosts
127.0.0.1 localhost.localdomain localhost
192.168.0.40 ebs1213.premier.com ebs1213
STEP 6:
If the /etc/sysconfig/networking/profiles/default/network file exists, remove it:
ls: cannot access /etc/sysconfig/networking/profiles/default/networ*: No such file or directory
STEP 7:
Add the following lines to the “/etc/security/limits.conf” file:
cat /etc/security/limits.conf
* hard nofile 65535
* soft nofile 4096
* hard nproc 16386
* soft nproc 2047
STEP 8:
Create Oracle Inventory Directory:
mkdir -p /db/apps/oraInventory
cat /etc/oraInst.loc
inventory_loc=/db/apps/oraInventory
inst_group=oinstall
chmod 777 /etc/oraInst.loc
STEP 9:
Create Appropriate Users and Groups:
groupadd oinstall
groupadd dba
usermod -g oinstall -G dba oracle
passwd oracle
usermod -g oinstall -G dba applmgr
passwd applmgr
STEP 10:
Create Directory Structure and Change Ownership & Permissions:
cd /db
ls -ltrh
mkdir oracle
cd /app
mkdir applmgr
chmod -R 777 /db/oracle
chown -R oracle:dba /db/oracle
chown -R applmgr:dba /app/applmgr
chmod -R 777 /app/applmgr
chown -R oracle:oinstall /db/apps
chmod -R 777 /db/apps
Files required to Install EBS R12.1.1:
p11072566_R12_GENERIC.zip – Latest startCD(12.1.1.13)
V15679-01_1of3.zip, V15679-01_2of3.zip, V15679-01_3of3.zip, V15680-01_1of3.zip, V15680-01_2of3.zip, V15680-01_3of3.zip, V15681-01_1of3.zip, V15681-01_2of3.zip, V15681-01_3of3.zip, V15682-01_1of3.zip, V15682-01_2of3.zip, V15682-01_3of3.zip, V15683-01_1of3.zip, V15683-01_2of3.zip, V15683-01_3of3.zip, V15684-01_1of3.zip, V15684-01_2of3.zip, V15684-01_3of3.zip, V15685-01_1of3.zip, V15685-01_2of3.zip, V15685-01_3of3.zip, V15686-01_1of3.zip, V15686-01_2of3.zip, V15686-01_3of3.zip, V15687-01_1of3.zip, V15687-01_2of3.zip, V15687-01_3of3.zip, V15688-01_1of2.zip, V15688-01_2of2.zip, V15689-01.zip, V15690-01_1of3.zip, V15690-01_2of3.zip, V15690-01_3of3.zip, V15691-01_1of3.zip, V15691-01_2of3.zip, V15691-01_3of3.zip, V35224-01_1of3.zip, V35224-01_2of3.zip, V35224-01_3of3.zip.
Creating Staging Area:
Copy the above files into the server:
Unzip the startCD file and run the perl script to create the stage
cd /soft/stageR121/startCD/Disk1/rapidwiz
perl adautostg.pl
Stage directory(here give your directory location example : /soft/stageR121)
Enter the default option (option 1 )to stage all the required s/w
the below directories are created
[root@ebs1213 stageR121]# pwd
/soft/stageR121
[root@ebs1213 stageR121]# ls
oraAppDB oraDB oraApps oraAS startCD
[root@ebs1213 stageR121]#
As root user execute the following command:
xhost +
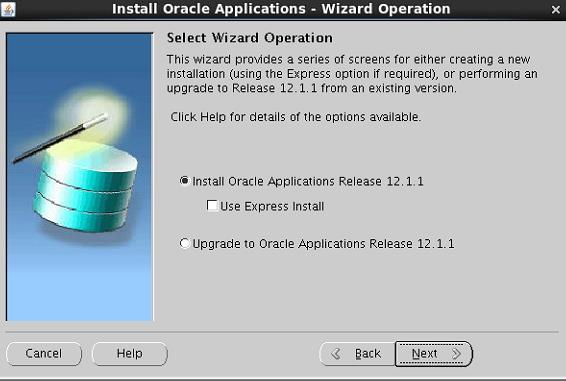
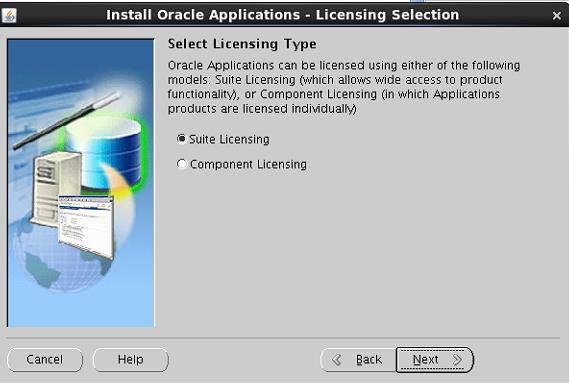
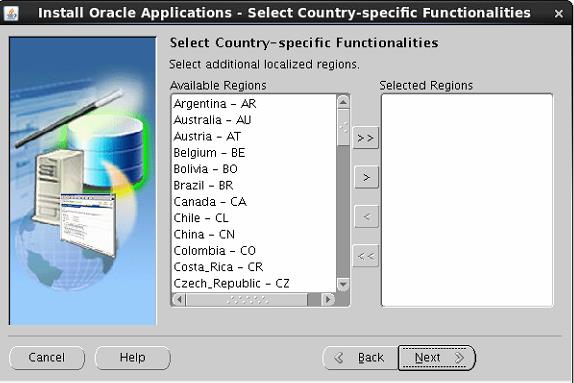
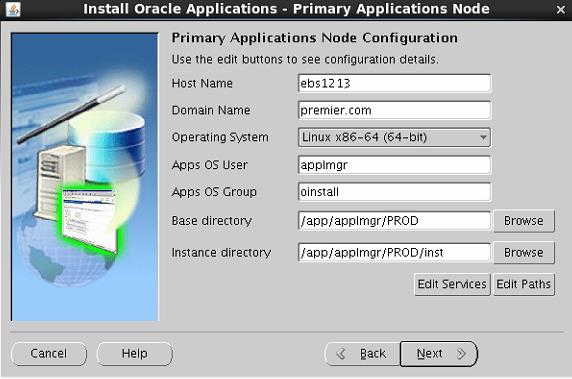
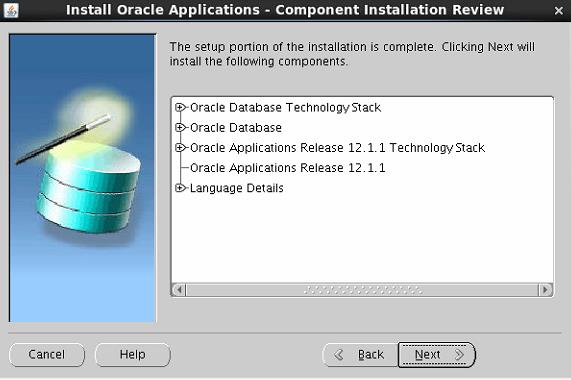
Installation of EBS R12.1.1:
|
From the startCD execute rapidwiz:
cd /soft/stageR121/startCD/Disk1/rapidwiz
./rapidwiz
|
 |
 |
 |
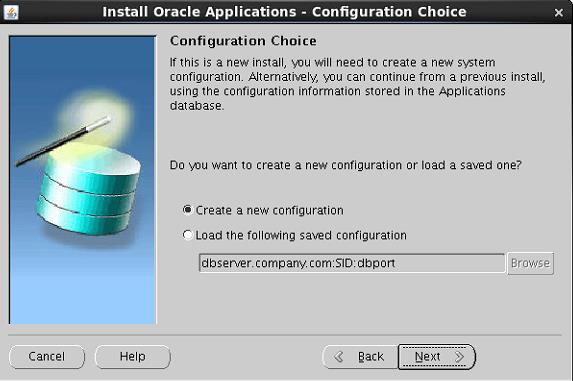 |
|
Edit the ports, if you wish to change the default ports. Here I am going with the default ports.

|
 |
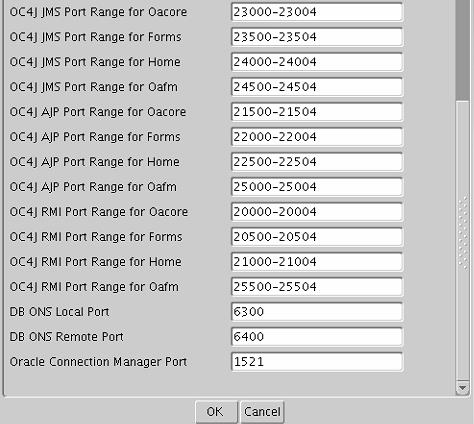 |
|
Provide the appropriate details like Database SID, hostname with owner, groups of the installation directory for the database.
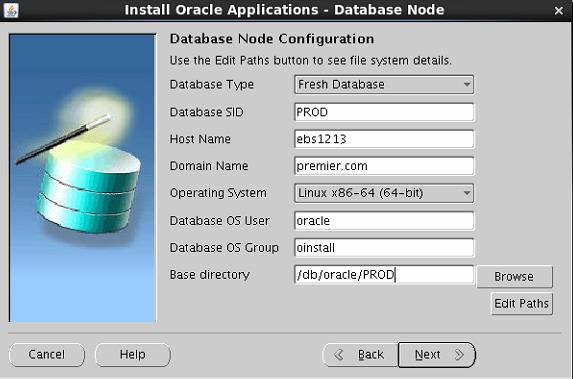
|
 |
 |
 |
 |
|
Provide the appropriate details like hostname with owner, groups of the installation directory for the application.
|
 |
 |
 |
 |
 |
|
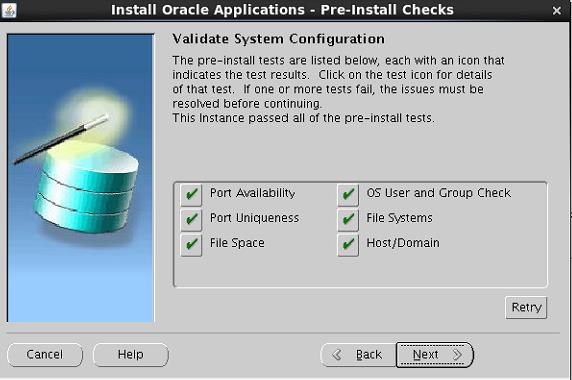
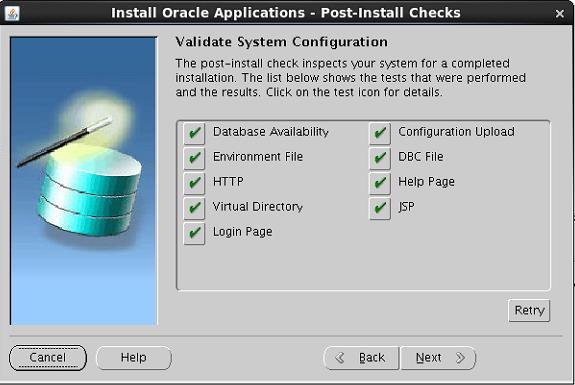
Once, the installation is complete, post-install validation run’s automatically. If it is successful, then installation is completed, else if any of the check is errored, check the log, fix-up the issue and retry.
|
 |
|
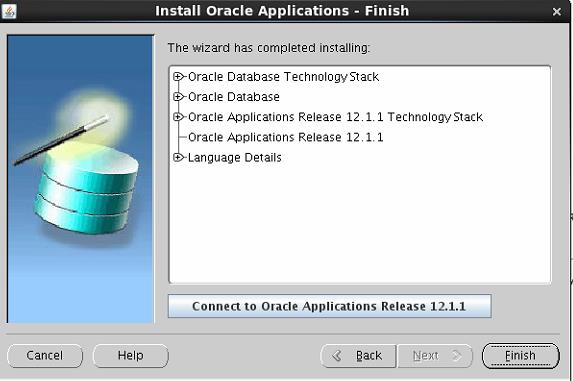
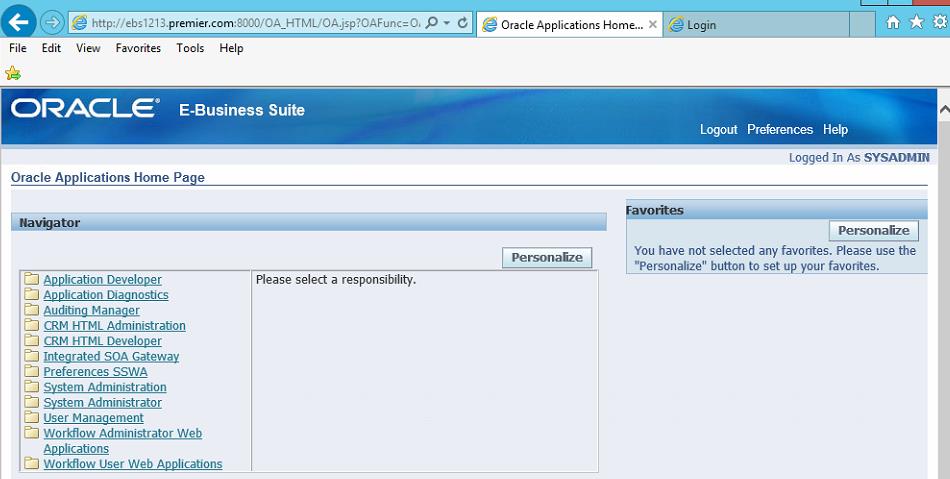
Finally, place the cursor above the “Connect to Oracle Application Release 12.1.1” to get the Application front-end URL

|
 |
 |
 |
 |

